-
-
There is a battery quick disconnect that should be used to disconnect the chassis battery ground before performing this bypass
-
The battery disconnect instructions are for general reference only. For instructions and chassis specific details, refer to your vehicles owner manual before performing this disconnect.
-
The battery disconnect instructions are for general reference only. For instructions and chassis specific details, refer to your vehicles owner manual before performing this disconnect.
-
-
-
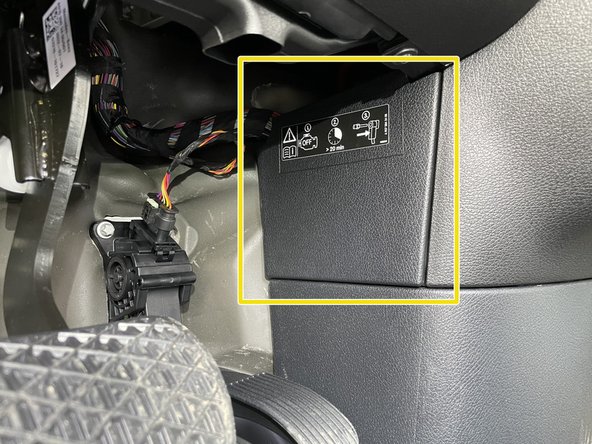
Locate battery quick disconnect cable behind access panel
-
There is a red tab on the top of the disconnect cable. To release the cable from the post, the red tab needs to be pushed downward
-
Push the red tab downward to release the cable and pull towards the rear of the cable at the same time to remove cable from post
-
Carefully place battery disconnect cable to the side
-
-
-
Pull back weather seal from driver door jam
-
-
-
Using a pry tool remove intermediate panel between A pillar and kick panel
-
-
-
Remove the 2 x T20 screws from the sill cover
-
Remove the 2 x T20 screws from the sill cover
-
-
-
Remove 1 x T20 from below hood release
-
-
-
Remove 1 x T20 from bottom of kick panel
-
-
-
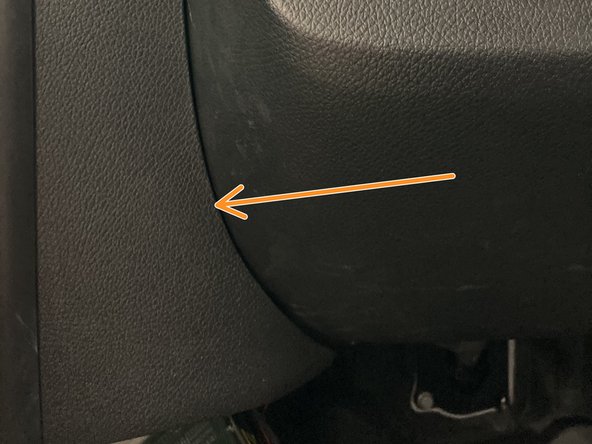
Remove plastic push fastener next to knee bolster
-
-
-
Remove plastic push pin from kick panel (behind hood release)
-
-
-
Remove 3rd plastic push fastener from kick panel
-
-
-
Remove kick panel
-
Route hood release through kick panel opening
-
Be careful of OBD harness
-
-
-
Disconnect OBD harness
-
Carefully route hood release through opening and set trim piece panel aside
-
-
-
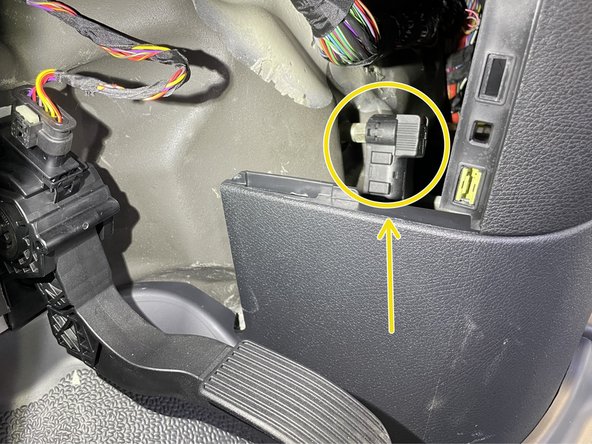
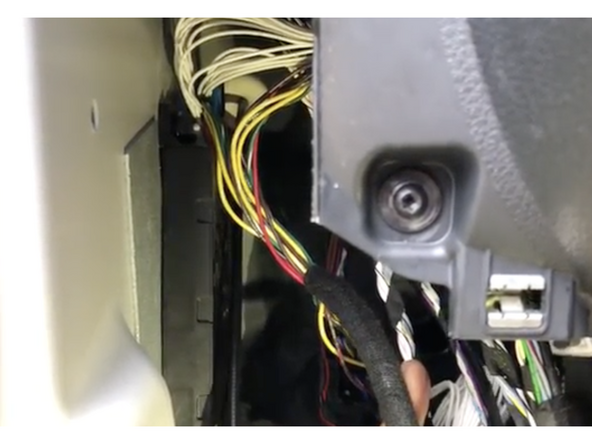
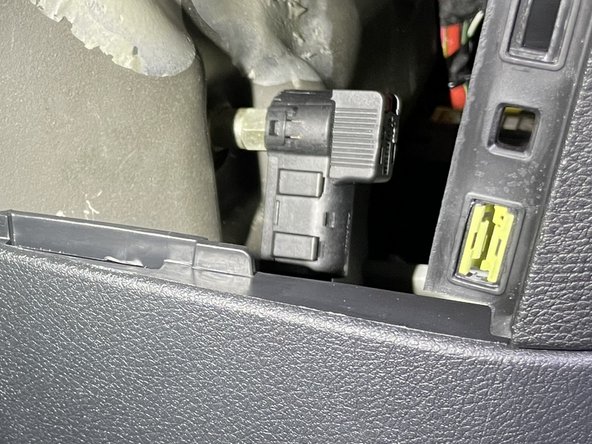
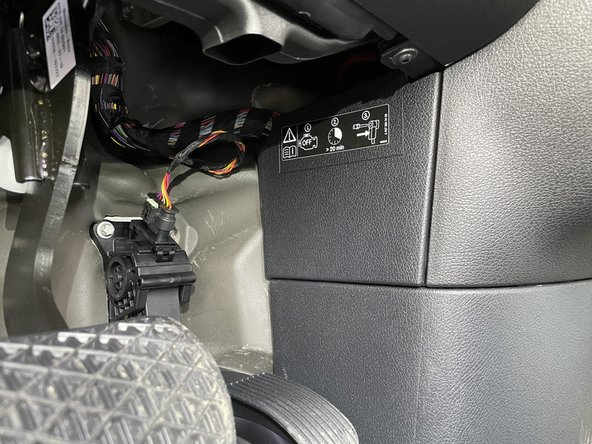
Locate EIS module in driver kick (mounted to exterior wall below A pillar)
-
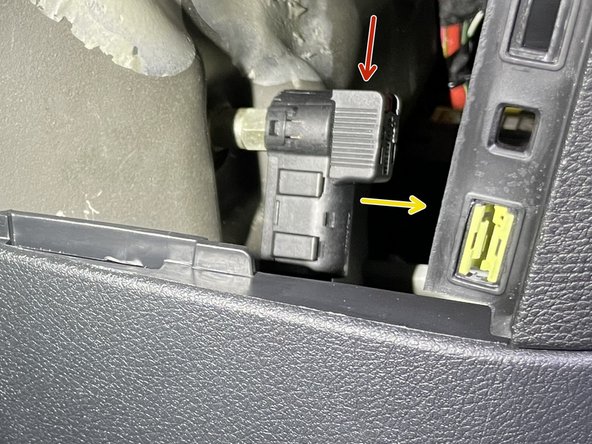
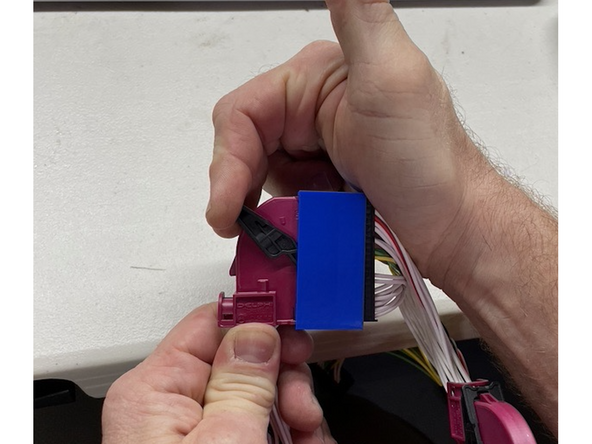
Unlatch and unplug 40-pin BLUE connector from top of EIS module
-
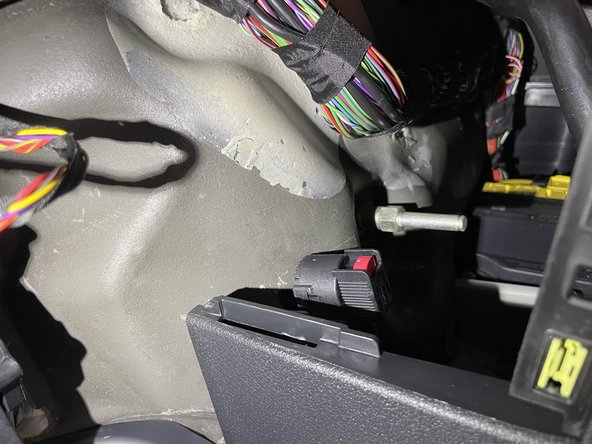
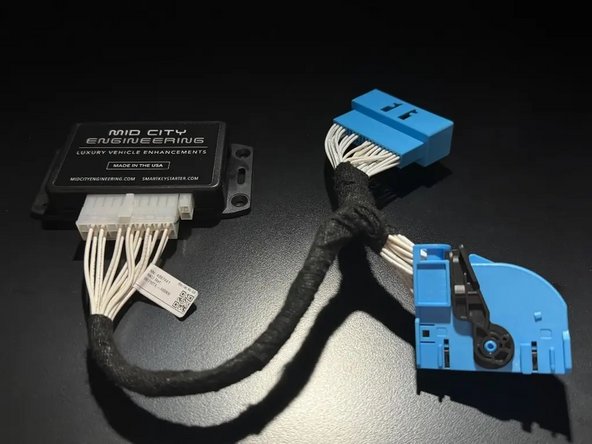
Connect 40-pin BLUE connector from EIS to mating connector on T-harness
-
The blue or pink mating plugs have a latch. When connecting the T-harness to the OEM module and the OEM harness to the T-harness, make sure that the plug latches and clicks into place (latch should be straight up).
-
Note: if you are installing or have already installed the SmartKey Starter® remote start/remote start and high idle, connect the SmartKey Starter® directly to the OEM EIS module and connect the 907G360 harness between the SmartKey Starter T-harness and the OEM harness
-
-
-
Reconnect battery disconnect cable from to post from step 2
-
Ensure that cable locks into place on post. You should feel the tab lock into place. Once connected, you should not be able to remove cable from post without pressing red tab downward
-
Replace access panel
-
-
-
Mount 907GRADON module using zip ties. Suggested location is to wiring harness in driver under dash.
-
DO NOT mount the module on or near any heat sources or moving parts (eg, vents or steering column)
-
Re-assemble vehicle in reverse order of disassembly steps
-