Tools
No tools specified.
Parts
-
-
Using pry tool, remove panel at end of knee bolster
-
-
-
Remove two screws and panel and end of footwell
-
-
-
Turn plastic screws in counter clockwise
-
Remove panel
-
Pull back floor and remove fuse access panel
-
-
-
Pull back plastic floor
-
Remove one screw holding sill panel in place
-
-
-
Remove 2 plastic panel tabs
-
-
-
Pull back floor and remove sill panel
-
-
-
Remove bolt near door opening
-
Connect ring terminal from provided black wire on post
-
Replace bolt and tighten
-
-
-
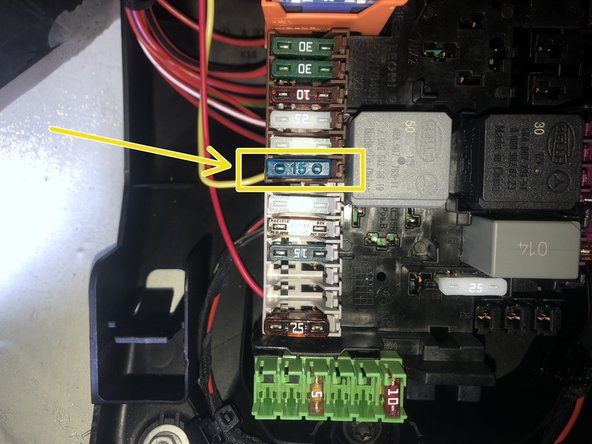
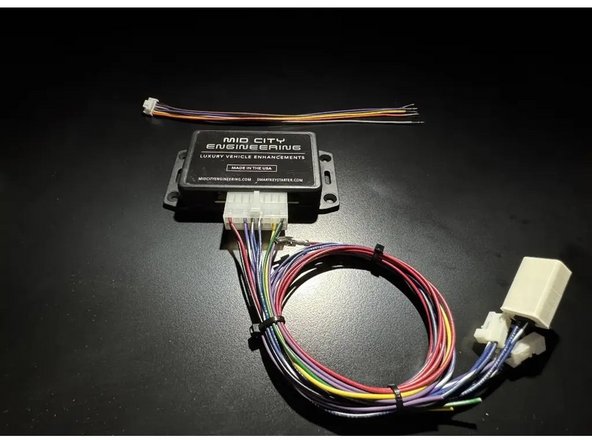
The 907SHIFTLOCK harness comes with a red power lead terminating at a fuse holder terminal. This fuse will pin into the fuse box under the passenger floor
-
Remove provided fuse and route empty fuse holder terminal through underside of fuse box and insert into one side of fuse location marked on picture left (yellow wire shown in picture)
-
From top of the fuse box connect provided fuse to fuse holder terminal
-
-
-
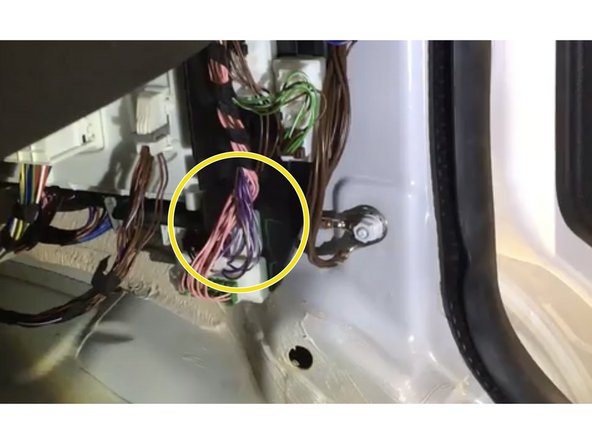
Locate CAN distribution block below the A pillar with purple and purple/white wires
-
Plug provided 2 pin white CAN plug terminating the purple and purple/white wires into any empty spot in the distribution block.
-
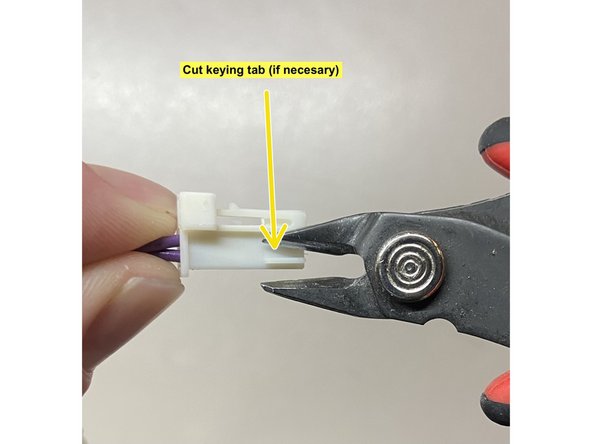
It may be necessary to cut the keying tab on the provided 2 pin connector. See picture.
-
-
-
Locate the distribution block that has OEM blue and blue/white wires
-
Connect provided 2-pin plug terminating the blue and blue/white wires from the 907SHIFTLOCK harness into any empty spot in the distribution block with blue and blue/white wires
-
-
-
Wake up the vehicle by pressing the unlock button on the OEM key fob
-
The yellow light on the 907SHIFTLOCK module will begin to flash
-
Remove one of the 2-pin OEM plugs from the distribution block with blue and blue/white wires and connect to the provided male 2-pin connector terminating blue and blue/white wires
-
Wake up the vehicle by pressing the unlock button on the OEM key fob
-
Check LEDs on 907SHIFTLOCK module:
-
If yellow LED is still flashing, remove the OEM plug from the harness and plug back into the distribution block. Repeat above steps until you have identified the plug that causes the green LED to flash on the 907SHIFTLOCK module. Between each test, be sure to press the unlock button on the OEM key fob to wake up the vehicle.
-
If green LED is flashing, the correct OEM plug has been identified and connected to the T-harness. Move on to next step.
-
WARNING: The correct CAN plug must be identified and connected precisely. Incorrect connection of the CAN plug may result in drivability issues.
-