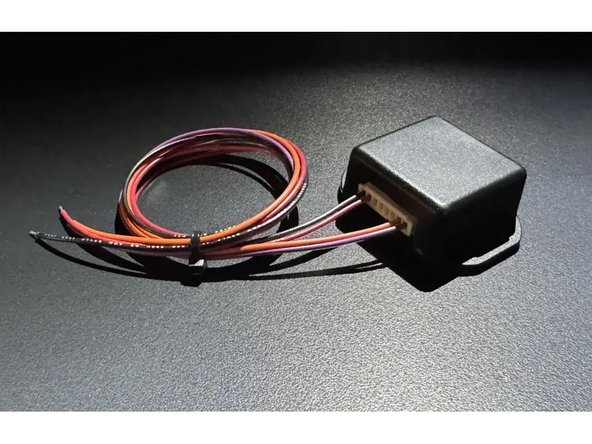
Introduction
The SKSXC is a remote start interface that connects to the Volvo telematics module in the passenger side kick.
The installation requires four (4) connections to the telematics harness.
- CAN high
- CAN low
- Power
- Ground
Optional connection: Compustar Drone telematics module for smart phone integration and GPS services
Optional connection: Compustar RF remote antenna for external remotes using Compustar FTD100 adapter
Standalone, the SKSXC will work using the factory key fob (3X lock)
Compatibility:
- XC40 2018-2024
- XC60 2017-2024
- S60 2019-2024
- V60 2019-2024
- S90 2017-2024
- V90 2017-2024
- XC90 2015*-2024
Note: any current body style Volvo should work with the SKSXC if OEM telematics is available with remote start. We are in the process of validating more models and model years and will update this list as we do.
-
-
Remove plastic trim cover along passenger door sill
-
-
-
Pull back flooring carpet
-
Access taped harness which goes from kick area to door
-
-
-
Cut section of tape and remove so that wires in harness can be accessed
-
-
-
Identify twisted pair of purple / white and purple / green wires from factory harness
-
There may be two (2) twisted pair of purple/white and purple/green wires in the factory harness. Either set may be used. Be sure to use the same wires from the same set (do not use one wire from one set and another wire from the other twisted set).
-
-
-
Connect purple/white wire from SKSXC harness to purple/white wire from factory harness
-
Connect purple/green wire from SKSXC harness to purple / green wire from factory harness
-
Be sure to solder and insulate all connections
-
-
-
Locate red wire in harness
-
-
-
Connect red wire from SKSXC harness to red wire from vehicle harness
-
Be sure to solder and insulate all connections
-
-
-
Locate black / white wire connected to bolt next to door jam
-
Connect black wire from SKSXC harness to black / white wire at bolt
-
Be sure to solder and insulate all connections
-
You may also use a ring terminal to connect SKSXC ground wire to bolt
-
-
-
Plug SKSXC module into SKSXC wiring harness
-
-
-
Ensure that vehicle is in a safe location to start engine
-
Close all doors (all doors AND windows must be completely closed for remote start to work).
-
It is important to test before re-assembling vehicle in case any troubleshooting needs to be performed
-
From outside vehicle, press lock button on key fob three (3) times
-
If the fuel in the vehicle is < 1/4 tank, the remote start will not work
-
The vehicle will allow for two (2) remote starts between key cycles of at least two (2) minutes. Ignition must be on with key (manual start or key takeover after remote start).
-
All doors AND windows must be completely closed for remote start to work
-
-
-
With remote start on, unlock and enter vehicle with key
-
Press foot brake and rotate turn-to-start clockwise (ignition). Instrument cluster will turn on.
-
Test gear shift. If gear shifts, key takeover has been performed.
-
-
-
Open hood
-
Step outside vehicle and close all doors (leave hood open)
-
Attempt to remote start using 3X lock on the key fob
-
Verify that remote start does not turn on
-
Close hood
-
-
-
Plug Compustar Drone into grey port on SKSXC module
-
-
-
Activate Drone at www.dronemobile.com
-
Ensure that blue and green LEDs on Drone are both flashing
-
-
-
Setup Drone module/account on mobile application in accordance with Drone quick-start instructions (or go to test site if you are a Compustar dealer).
-
Close all doors and lock vehicle using key fob. Remote start will not work unless all doors are closed and vehicle is locked.
-
Open Drone mobile application or login to Drone on web browser and press 'START' button. Vehicle should start.
-
-
-
Connect one side of included adapter cable into the black port on the SKSXC module
-
Connect antenna into adapter cable
-
-
-
To program remotes, cycle the ignition on and off(using push to start dial) 5X. OEM horn will sound indicating programming mode is entered. Hit lock on each Compustar RF remote being programmed (starting with 2-way if applicable)
-
If antenna has programming button, press programming button on antenna after 5th ignition cycle
-
-
-
Once RF remotes are programmed (see previous step), test remote start/stop, lock/unlock from external RF remotes
-
-
-
Tape factory harness and make sure all connections are soldered and insulated
-
Securely mount SKSXC and Drone / RF antenna (if applicable). Recommended location is above factory module in kick
-
Move carpet back to original position
-
Replace plastic trim cover
-

Troubleshooting
There are some conditions that will prevent the remote start from working, so please make sure that the following conditions are met:
- Fuel level at or below 25%
- Any window is open even a slight crack
- Door, hood, or trunk are open
- Vehicle key(s) are recognized. Please make sure all keys are far enough from vehicle that they are not being recognized by the internal antenna
- The timing of the 3X lock commands from the OEM key fob. If the commands are too close together or too far apart, the vehicle will not try to remote start
- Vehicle has been remote started or remote start attempted 2X before driving. The Volvo telematics module will allow you to remote start twice before it must be driven for at least 2 min. Please start the vehicle manually and run for at least 2 minutes, being sure to shift into gear and move vehicle
You can tell that the vehicle is receiving the command to remote start by looking at the instrument cluster. If the vehicle receives the command to remote start but fails you will see the check engine light on the dash light up briefly.
If there is no apparent attempt to remote start, check for 12V power at the red wire and verify chassis ground connection on the black wire.
Check that CAN H and CAN L wires are soldered, insulated and have a good connection.
