
Introduction
It is recommended that the SKSNG907, SKSNG907G, SKSNG907RV, SKSNG907RVG SmartKey Starter® be bypassed when performing any software updates or mechanical service.
It is also recommended that the SmartKey Starter® be bypassed as a standard practice for troubleshooting any issues with the vehicle.
The SmartKey Starter® is 100% plug & play and bypassing it is a simple procedure. This guide demonstrates how to easily bypass the system.
The system is connected by a T-harness to both the EIS and PCM modules- both in the driver side under-dash. The system can be bypassed by simply disconnecting the SmartKey Starter® T-harness and plugging the chassis harness back into the EIS and PCM.
To make bypassing the system easier, we have developed a set of jumpers that, when used, will completely bypass the SKSNG907 or SKSNG907RV. Rather than disconnecting the T-harness, the modules can be un-plugged and replaced with the jumpers. It is possible to mount the modules in a position where the jumpers can be installed to bypass the system in as little as 2 minutes. Instructions for using the jumpers can be found here: How to Bypass SKSNG907, SKSNG907RV, SKSNG907G, SKSNG907RVG SmartKey Starter® Using Jumpers
If you would like to be sent jumpers for bypassing a system, please email sales@midcityengineering.com with your software version and address and a set of jumpers will be sent to you.
If you are servicing the vehicle and have any questions, please do not hesitate to contact us at 312-421-1114 or sales@midcityengineering.com - we are happy to assist in any way.
-
-
There is a battery quick disconnect that should be used to disconnect the chassis battery ground before performing this bypass
-
The battery disconnect instructions are for general reference only. For instructions and chassis specific details, refer to your vehicles owner manual before performing this disconnect.
-
Vehicle ignition must be off for at least 20 minutes before using battery disconnect
-
Battery disconnect is located under the driver side dash to the right of the accelerator pedal
-
Remove access panel above and to the right of the accelerator pedal
-
-
-
Locate battery quick disconnect cable behind access panel
-
There is a red tab on the top of the disconnect cable. To release the cable from the post, the red tab needs to be pushed downward
-
Push the red tab downward to release the cable and pull towards the rear of the cable at the same time to remove cable from post
-
Carefully place battery disconnect cable to the side
-
-
-
Pull back weather seal from driver door jam
-
-
-
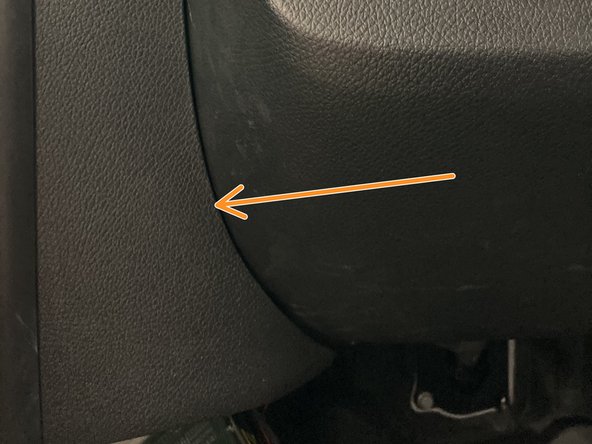
Using a pry tool, remove panel between A pillar and kick panel.
-
-
-
Remove the 2 x T20 screws from the sill cover
-
Remove sill cover and carefully set aside
-
-
-
Remove 1 x T20 from below hood release
-
-
-
Remove 1 x T20 from lower kick panel
-
-
-
Remove plastic push fastener next to knee bolster
-
-
-
Remove plastic push pin from kick panel (behind hood release)
-
-
-
Remove 3rd plastic push fastener from kick panel
-
-
-
Remove kick panel.
-
Route hood release through kick panel opening
-
Be careful of OBD harness
-
-
-
Disconnect OBD harness
-
Carefully route hood release through opening and set trim piece panel aside
-
-
-
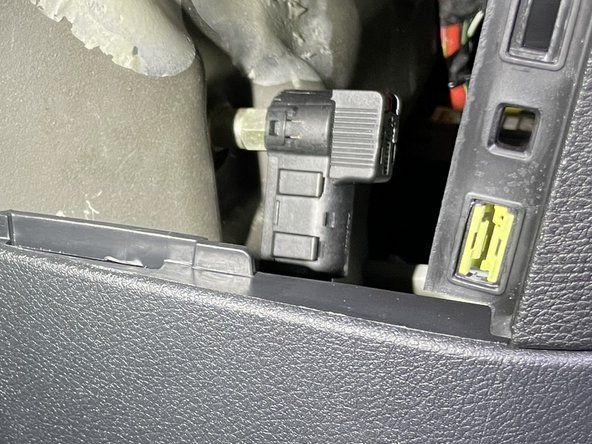
Locate PCM module behind pedals
-
Un-plug the black plug from T-harness that is plugged into PCM module
-
Un-plug black OEM plug that is connected to T-harness
-
Plug black OEM plug back into the PCM module
-
-
-
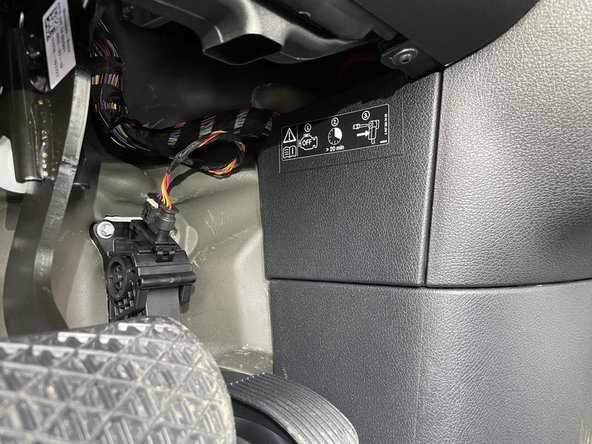
Locate EIS module at base of A pillar
-
Un-plug the blue plug from T-harness that is plugged into EIS module
-
Un-plug blue OEM plug that is connected to T-harness
-
Plug blue OEM plug back into the EIS module
-
The SmartKey Starter® is now bypassed
-
To re-install the SmartKey Starter® click here for installation instructions
-
-
-
Reconnect battery disconnect cable from to post from step 2
-
Ensure that cable locks into place on post. You should feel the tab lock into place. Once connected, you should not be able to remove cable from post without pressing red tab downward
-


Cancel: I did not complete this guide.
One other person completed this guide.